How to Access an Online Certification Training Program: Training Administrator Assigns Seats
In this document:
A. Steps 1-6 describe how the Training Administrator assigns a seat to the End User.
B. Steps 6-11 describe how the End User creates a Program Account and accesses the program for the first time.
C. Steps 12-16 describe how the End User, who already created a Program Account, accesses a new program assigned to him/her.
Step 1: During checkout the Purchaser created an Account on the DataChem Software website.
Step 2: To Access your Online Program go to the DataChem website (https://www.datachemsoftware.com/) → My Account and login to your account.
Step 3: In My Account select Online Programs at the top left of the screen. You should see the following screen.
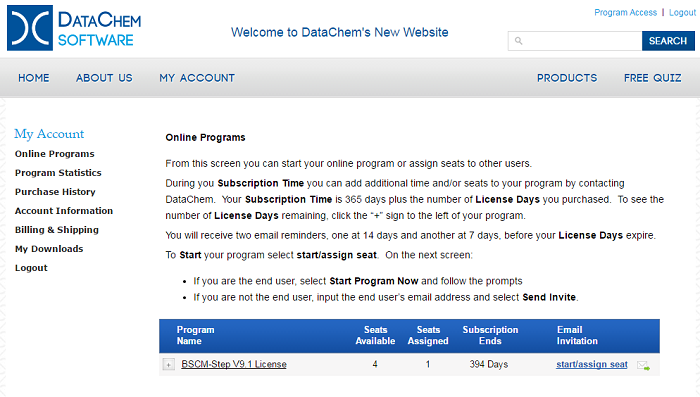
Step 4: As the Purchaser, to access the program, select “start/assign seat” in the above screen. You should see the following popup.
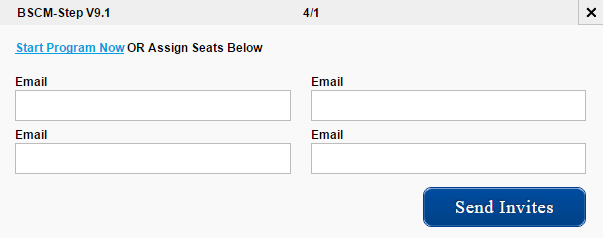
Step 5: To Assign a Seat, enter the end user’s email address and select “Send Invites”.
Step 6: The end user will receive an email from you that looks similar to following email. Your name and email address that you used to set up your account will show at the bottom of the email.
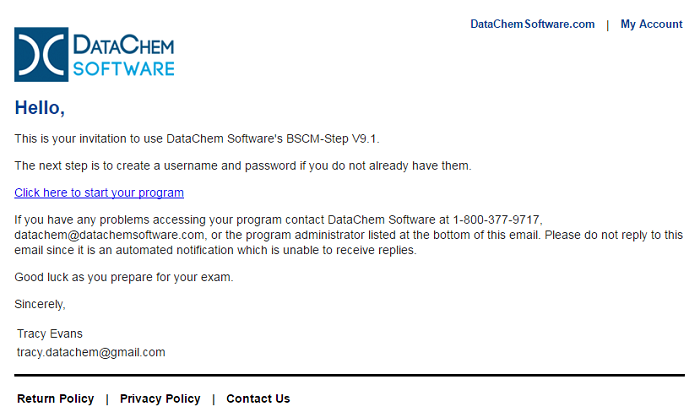
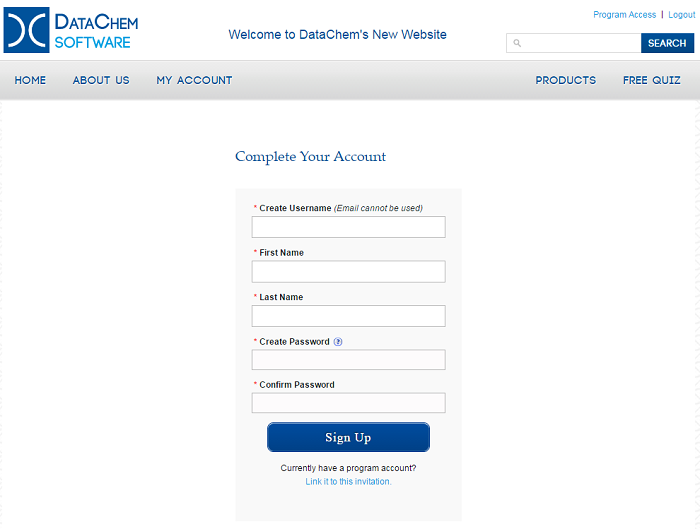
Step 7: The end user must “Click here to start your program” in the above email. The end user will then see the following screen. On this screen the end user will create a “Program Account”. This links the program to this Account. After completing the information on this screen, select “Sign Up”.
*If the user already has a Program Account they should click on the link “Link it to this invitation” which is below “Sign Up” and go to Step 12 in these Instructions.
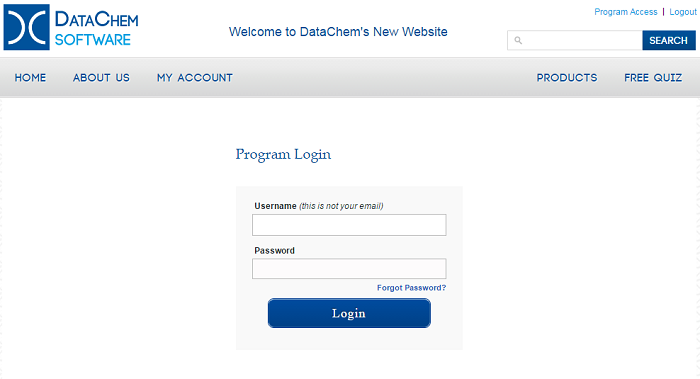
Step 8: After selecting “Sign Up” the end user will see the following screen. The end user will re-enter their Username and Password they just created for their program and select “Login”.
Step 9: The end user should see the following screen. This is their Program Account page.
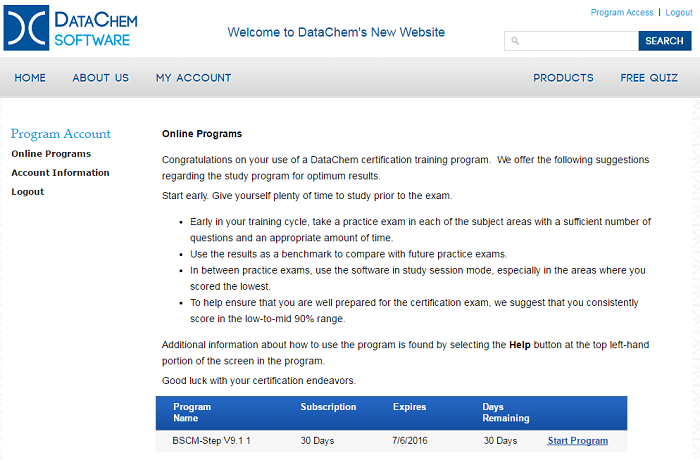
Step 10: The end user will access their program by selecting “Start Program” in the above screen. The end user should see the License Agreement for the program. After accepting the License Agreement, the end user will have access to the program. If the end user needs help navigating within the program, select “Help” at the top left of the program screen.
Step 11: IMPORTANT: To access the program in the future, the end user will select “Program Access” at the top right of any screen on the website and fill in their user name and password.
End Users with an existing Program Account:
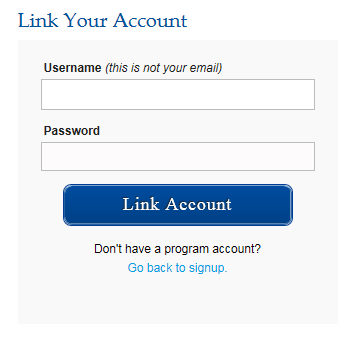
Step 12: If the end user has a Program Account, in Step 7 they should have clicked on the link “Link it to this invitation” below the “Sign Up” button. The end user will see the popup below. They will fill in their Username and Password and then select “Link Account”. This will link the program to their account.
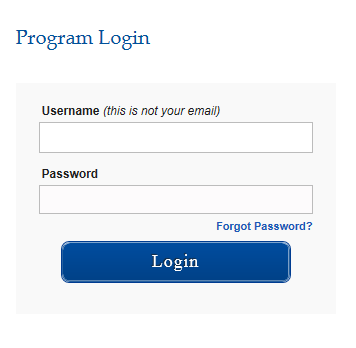
Step 13: After selecting “Link Account” the end user will see the following popup. They will need to re-enter their user name and password to access the program.
Step 14: After selecting “Login” the end user will see their Program Account screen.
Step 15: The end user will access their program by selecting “Start Program” in the above screen. The end user should see the License Agreement for the program. After accepting the License Agreement, the end user will have access to the program. If the end user needs help navigating within the program, select “Help” at the top left of the program screen.
Step 16: IMPORTANT: To access the program in the future, the end user will select “Program Access” at the top right of any screen on the website and fill in their user name and password.